When it comes to SEO, Yoast is the ultimate plugin. Without a doubt, it can help you get to the #1 spot!
So installing it means you deserve a thumbs up. Or do you?
The thing is, installing it is just the beginning. To harness its full potential, you need to apply the best settings.
Don’t know how to do it? Then sit back and relax.
In this post, we’ll walk through the process on how to effectively optimize your Yoast plugin. This way, you can gear up with the tool and face your challenges head on!
Let’s start learning how to make your website searchable on Google using Yoast SEO plugin.
Why do you need Yoast?
First, the basics.
Just like every other website who wants to dominate their industry, you need Yoast to be at your best. SEO can be very complicated. But this plugin can make it seem otherwise.
Its free version can be enough to help you improve your work and increase your position in the SERPs. And if you want more, there’s no stopping you from getting the premium.
Just install and activate the plugin to get the ball rolling.
How to generate XML sitemaps
Organization is important in SEO. If your website is disorganized, Google will find it difficult — if not impossible — to go through it. And if it can’t go through it, how do you expect it to get ranked?
So you need to keep things organized and an easy way to do that is to turn to sitemaps!
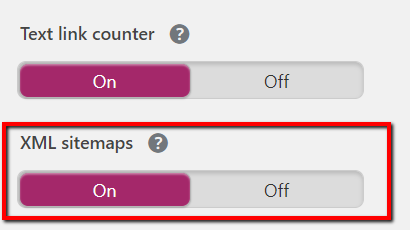
When you first installed Yoast, an XML sitemap was auto-generated for you. And every time you create new content, this sitemap is consistently updated.
Because the plugin pretty much does the job on your behalf, you can just chill. Make sure it’s switched on, though.
To check, just go to SEO > General > Features. There, see if it’s on!
How to edit meta description, SEO title, and slug
Notice those descriptive texts under a website’s URL in the SERPs?
Well, they make up a meta description. And meta descriptions are important because they help summarize your page’s content.
If a person searches Google using particular words that are in your meta description, there’s a high chance that you will appear in the results. So if you optimize your meta description, you’re moving in the right direction.
The same goes for your page’s SEO title. You need to make it eye-catching and keyword-rich. After all, it’s one of the first things that people see!
That, and your page’s slug (or that part of a URL that describe your page’s content).

You should optimize these elements because they can increase your worth to search engines. After all, 93% of online experiences start from a search engine.
And with Yoast, you can easily work your magic on these elements. To begin, scroll down to the plugin’s section and click the Edit snippet button.
How to check your content’s readability
Writing about your favorite topic makes things a notch easier. You can write away and bring light to your passion.
On the flip side, you need to come to terms with this fact: you are writing for an audience.
Basically, you can write however you want as long as it’s not gibberish to your target audience.
This means, they should understand you. And to understand you, it’s your job to make your content readable.
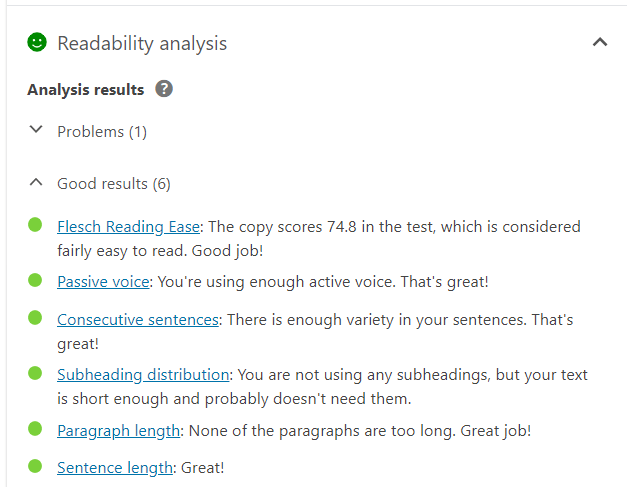
Fortunately, Yoast comes with a solution: a Readability analysis section!
To check it out, just scroll down as you create a new post. And make sure to expand this section to view the analysis.

Doing so reveals important information. This includes your Flesch Reading Ease score, subheading distribution, and usage of passive voice.
How to use a focus keyphrase
Getting good grades for readable content is cause for a celebration. Then again, sorry to break your bubble but your content’s readability is just one part of the equation.
Even if your content is readable, it won’t be useful to your audience if you have gone off-topic. So another way to write for your audience is to give them the right content.
Good thing, Yoast can help you address this issue. Just enter a focus keyword/keyphrase and the plugin will inform you of how you’re doing!
How to perform an overall SEO analysis
Once you enter your focus keyphrase, that’s when you can figure out how you’re doing. And to make that happen, just head on over to the SEO analysis section and expand it.
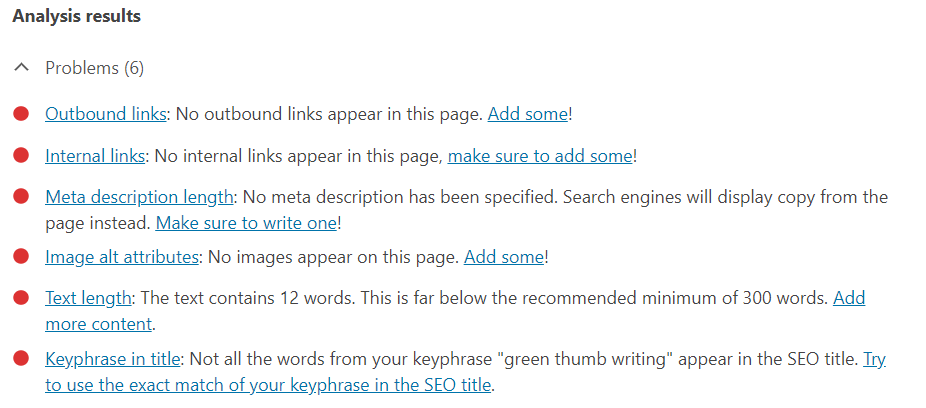
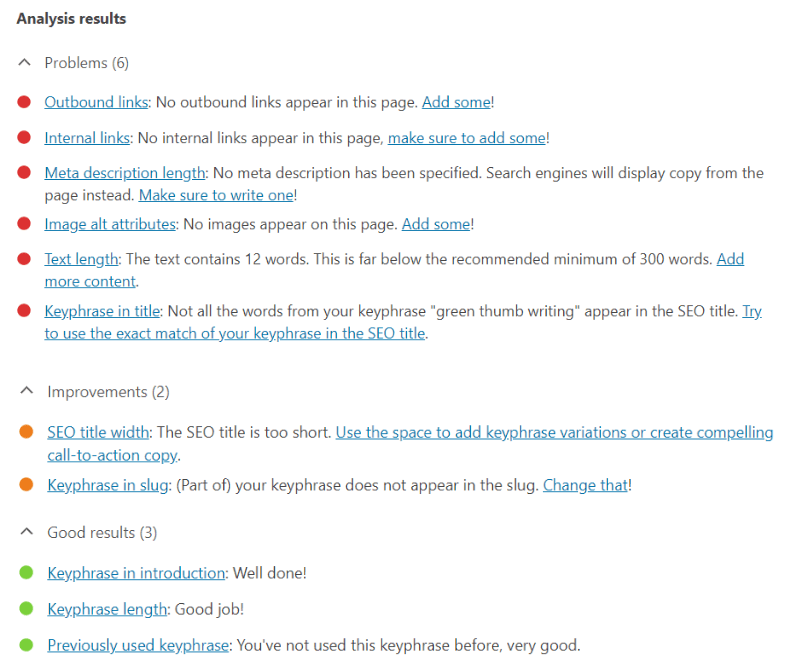
Here, you’ll find information about how you’re using your focus keyphrase.

And beyond that, you can also get information about your content’s overall SEO performance!
Here, you can see information about outbound and internal links, meta description length, image alt attributes, and more!
And if you want to know your SEO performance without the in-depth information, you can just check your WordPress toolbar. There, you will find a colored bullet next to the Yoast icon.

This bullet’s color is either:
- Red: Your work is problematic
- Orange: Your work still needs improvement.
- Green: You’ve done well!
How to mark your post as cornerstone content
If you want your post to serve as one of your central pieces, you should mark it as a cornerstone content. By then, Yoast won’t treat it as just a regular post.
Instead, it will have higher standards. In terms of the Readability analysis and SEO analysis, it will be stricter and coach you with more improvements.
The reason is simple: a cornerstone content is a vital piece.
Its job is to help your visitors understand your website and navigate their way on it. And beyond that, it holds the power to getting traction and attracting more backlinks.
To help it unleash its power, you need to craft it in a way that it becomes so heavy with relevant content!
Luckily, Yoast can help you out with this.
At the bottom, you will see a section that says Cornerstone content. Now, make sure to expand it.
Then switch on the button on the same row that reads Mark as cornerstone content.

How to customize your post for Facebook
Billions of people around the world are active Facebook users. That said, if you want to reach out to lots of people, sharing your post on the social network is practical.
Especially if you’ve installed sharing buttons, sharing your post on Facebook is easy-peasy. But wanting your post to appear in a certain way can help you cater to your audience on Facebook better.
And with Yoast, that’s not going to be a problem!
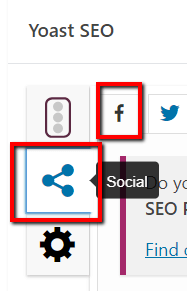
Just scroll down to the plugin’s section of your post. Click the social tab and the Facebook icon.
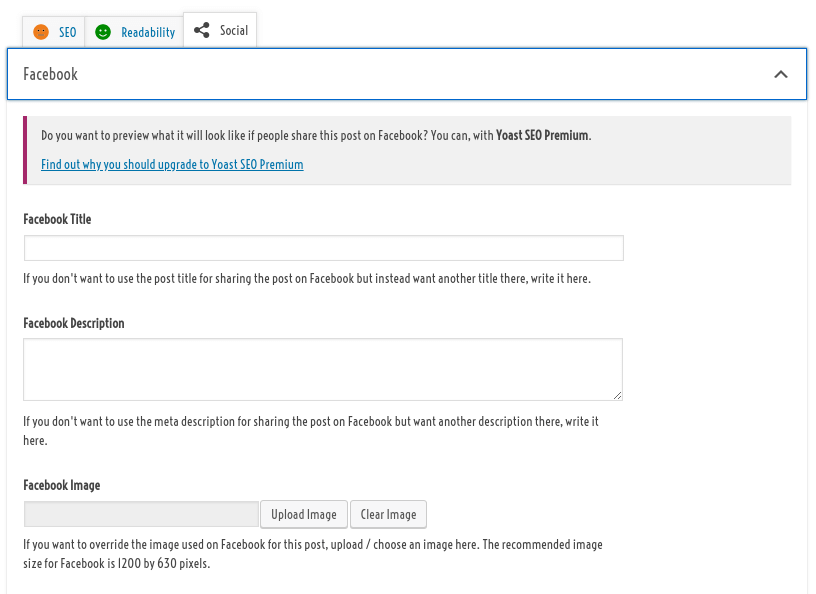
From there, you can edit the Facebook Title and Facebook Description. You can also upload a Facebook Image!
How to customize your post for Twitter
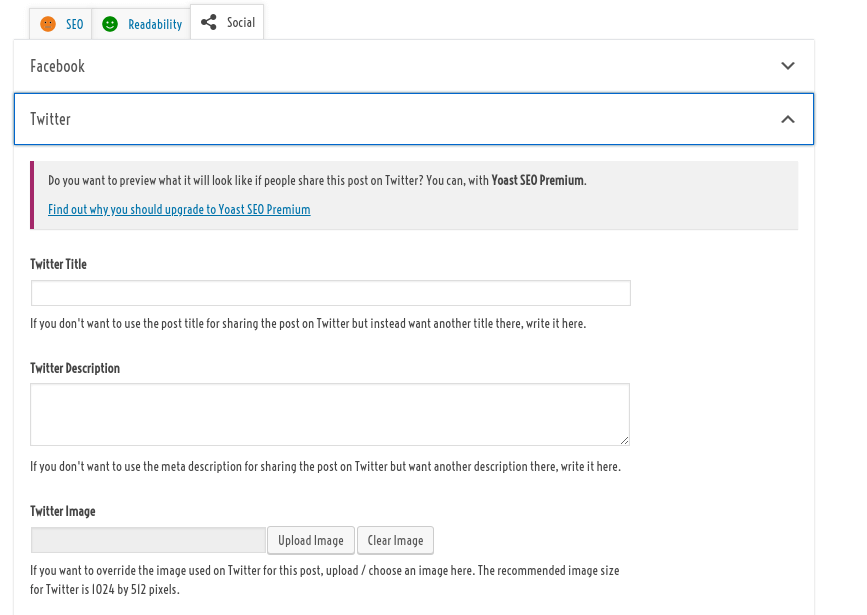
The same approach applies when you want to customize your post for Twitter. Just hit the social tab and the Twitter icon.
And from there, you can edit away.
Conclusion
And that’s all for this ultimate Yoast SEO tutorial. As you can see, you can use it to greatly drum up your game in SEO.
It doesn’t matter if you’re a beginner or an expert in the industry. So long as you’re equipped with the right tools and a winning mindset, dominating the battle is in your cards!
