There are different ways to install WordPress on your web server and on your local machine. You can easily install WordPress on your web server with Softaculous and Fantastico auto installers.
Advance WordPress users can install WordPress manually on their hosting accounts, but manual WordPress installation is not easy, especially if you are a beginner WordPress user.
On your local Windows, Mac or Linux machine, you can install WordPress with WAMP, MAMP, XAMPP, Bitnami and other free and premium software.
How to Install WordPress in SubDomain with Softaculous on NameCheap
In this tutorial, I am going to teach you, how you can install WordPress on your web hosting account with softaculous. We will install WordPress on a sub-domain. e.g demo.justlearnwp.com
You can also install WordPress on http://example.com/demo. This is called sub-directory installation.
- create a sub-domain using CPanel
- Install WordPress with Softculous
So let learn how to install WordPress on a sub-domain.
How to Create a Sub-Domain in CPanel
To install WordPress on a sub-domain, You will have to create a sub-domain. Log in to your web-hosting control panel. CPanel and Plesk are very popular web hosting control panels. My host offers CPanel.
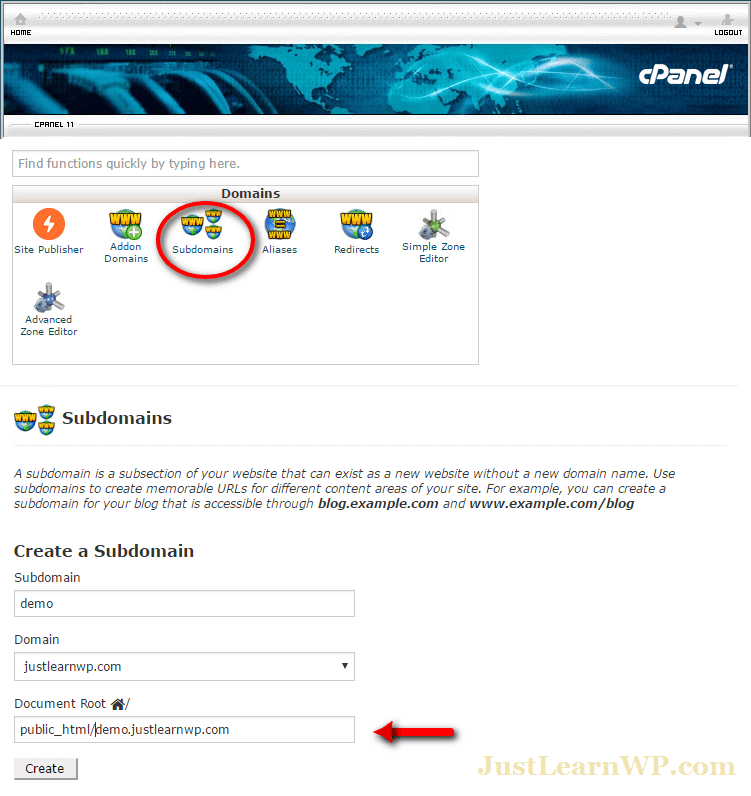
Under Domain section click on Subdomains. You will see a new page to create a sub-domain. You can see the screenshot below.

Type your sub-domain name. In our example, we are going to use demo as sub-domain. Your sub-domain name can be anything you like such as blog, images, demos etc.
If you have registered multiple domain names, select your desired domain and document root folder. In our case, document root folder is public_html/demo.justlearnwp.com.
Now click on create button to create your new sub-domain. That’s all. You have successfully created a sub-domain. Now, You can install WordPress on this new sub-domain name.
How to Install WordPress on Sub-Domain
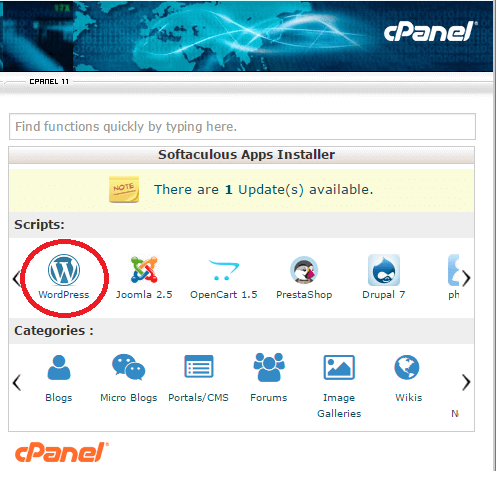
After creating a sub-domain, we will install WordPress on this new sub-domain. In CPanel, find and click on Softculous or you can also see WordPress under Scripts section in Softaculous Apps Installer.

Click on WordPrss icon to visit installation page. You can see the screenshot below for details. There are so many options. Under software setup, choose protocol (http://, https://, http://www, or https://www), domain (your sub-domain) and directory (leave this field blank).

Under Site Settings add your site name and description. You can also Enable Multisite option but don’t select this option. WordPress multi-site is an advanced feature and you don’t need this feature as a beginner. You can always enable multi-site network later.
Under Admin account section choose a different username, Admin is not a good username for security reasons, type a strong password and enter your admin email.
copy your password and save it. You will need this password later to login to your WordPress site.
Under Advanced Options tab, You can type new Database Name and Table Prefix, if you want. Otherwise, Softaculous will generate them for you. If you want to make your WordPress site more secure and safe, change these values to something more strong and difficult to guess.
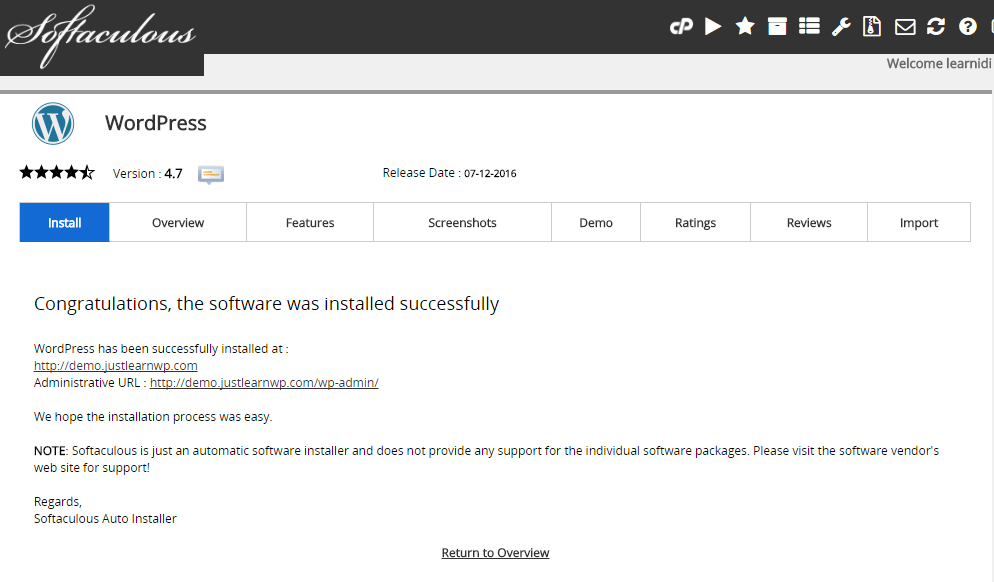
There are some other self-explanatory options as well. After adding all the necessary information, click the install button. It may take few minutes to install. After successful installation, You will see a success message with links to your main site and login page.

Final Words
That’s all. You have successfully installed WordPress on a sub-domain. If you see any error, such as This site can’t be reached or demo.yoursite.com’s server DNS address could not be found, just restart your browser and try to access your new site on sub-domain. I was able to access my site after restarting my Windows PC.