Every website needs some must-have tools, plugins, and services. Backups, speed optimization, mobile-friendly thems and contact forms to name a few. The contact form is one of the must-have plugins for your website and in this article, we are going to review HappyForms.
For WordPress users, there are plenty of options. You can choose from simple and complex contact form plugins. There are so many powerful free and premium plugins allow you to create any type of simple and multistep complex forms.
Today, I am going to show you how can you create contact forms very easily with HappyForms. A new WordPress contact form plugin.
Installation
Getting started with HappyForms is very easy. Simply logion to your WordPress Dashboard and go to Plugins > Add New section and type “happyforms” in the search box.
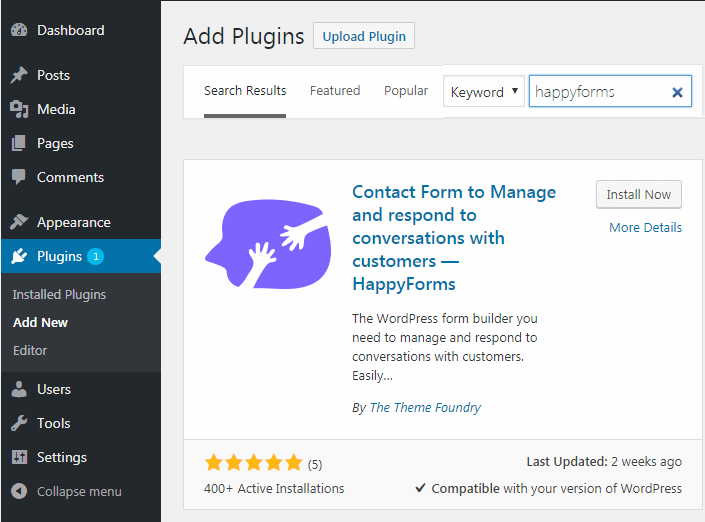
Install the first plugin from the list by By The Theme Foundry. Once the installation is complete, click the activate button, for the first time, you will be redirected to the welcome screen. After activating the plugin, a new tab will also appear in the sidebar menu.
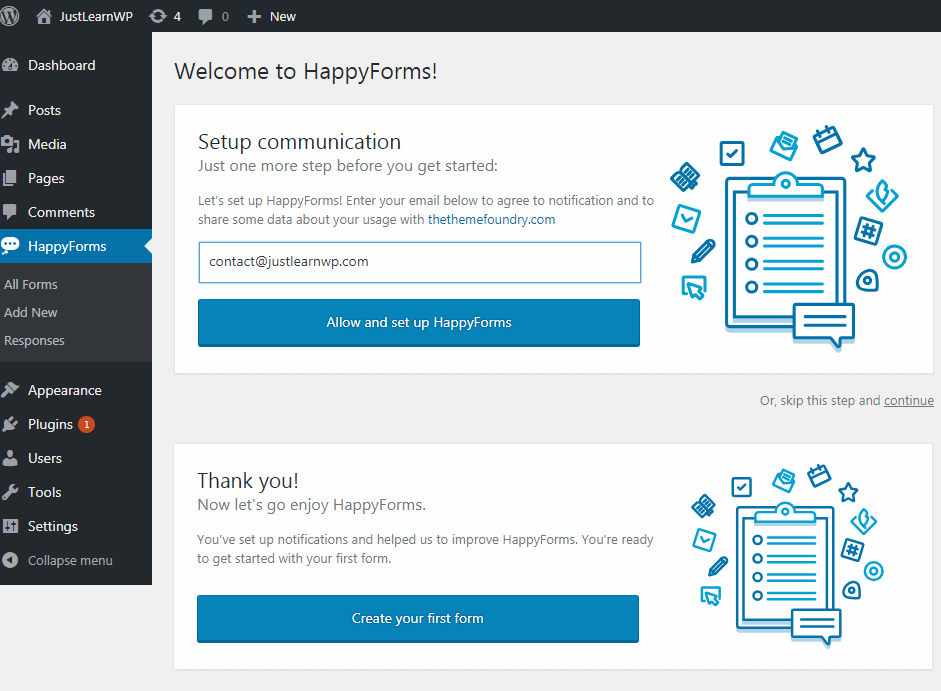
You will be asked to enter your email address so HappyForms team can send you notifications about the latest updates and to collect some data about your usage. This is completely optional and you can skip this option.
Type your email address and click Allow and setup HappyFoms button. After setting up notifications, You can start creating forms for your site.
Now, go to HappyForms > All Forms. A sample form is already available, You can simply copy the shortcode and paste it where you want to show the contact form.
I prefer to copy and paste shortcode for the sample form to see how form appears and works. After testing the sample form, You can edit the existing form or you can create new forms.
Creating a new form
To create a new form from scratch, go to HappyForms and click Add New link. You will be redirected to the new page, where you can not only create the form but a live preview will also be available.
You can add 16 different type of fields to your forms. Here is the complete list of available form fields.
- Short Text
For single line text fields. - Long Text
For paragraph text fields. - Email
For formatted email addresses. The ‘@’ symbol is required. - Website Link
For formatted website URLs. - Multiple Choice
For checkboxes allowing multiple selections. - Single Choice
For radio buttons allowing one selection. - Dropdown
For selecting one option from a long list. Default value adjustable. - Number
For numeric fields. - Phone
For phone numbers. Includes country-specific formatting. - Date & Time
For the formatted day, month, year and or time fields. - Address
For geographical locations. Includes Google Maps integration. - Scale
For collecting opinions using a horizontal slider. - Title
For displaying personal honorifics. - Legal
For requiring fine print before accepting the submission. - Rating
For collecting opinions using a zero to five-star scale. - Placeholder
For adding helper text, horizontal rules, and extra space.
The user interface is great and simple as well. Creating forms is really simple and easy, even novice users can create simple and complex forms easily without any problem.
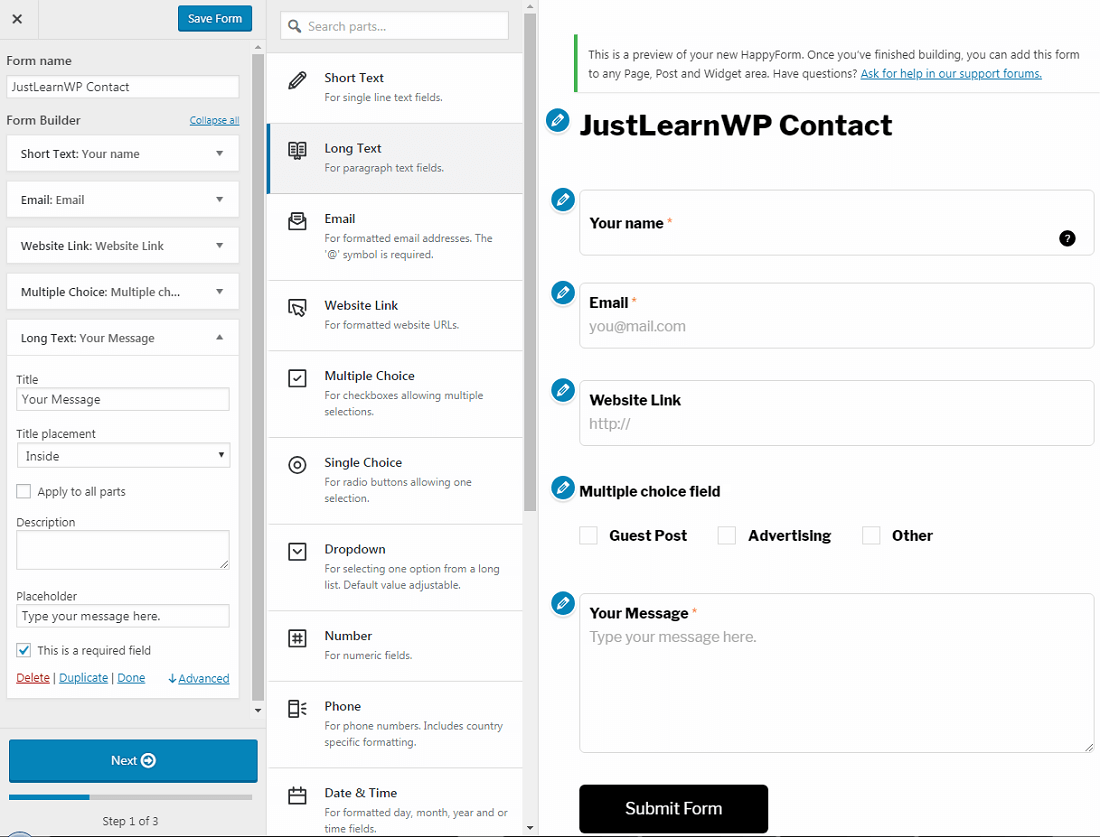
In the above screenshot, You can see that I have created a form with multiple fields. On the right-hand side, a live preview of my form is also available.
To add a field to your form, just hover your mouse and click on the field of your choice from the all available form fields. You have full control over every form field.
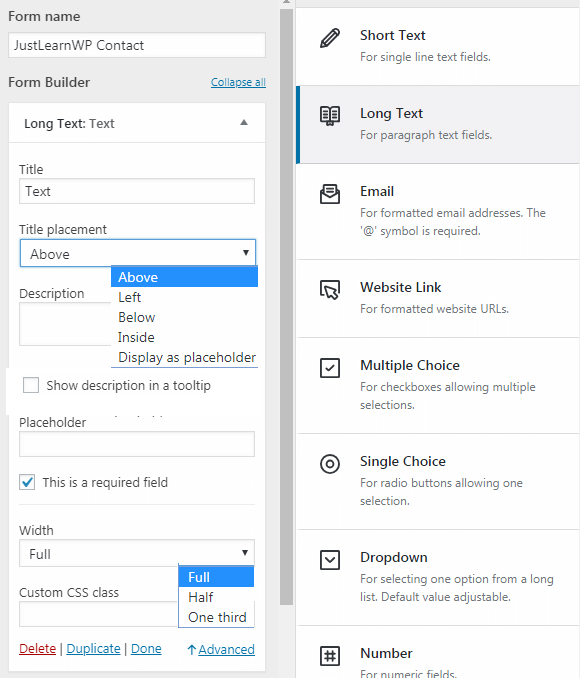
First of all, You need to add field title such as your name, last name etc. For the title placement, you have five different positions/options.
- above
- left
- below
- inside input
- display as placeholder
In my example form, I have chosen “Inside Input” position for the title placement. You can also give the description to form fields to explain them further.
To display field description as a tooltip, check the “Show description in tooltip” checkbox.
You can also make any field required by checking “This is required field”checkbox.
For the multiple choice field, you have two display options.
- Horizontal
- Vertical
Step 2 to create a form
Once you have added all necessary fields to your form, click the next button. In step 2, You can add a different email address to receive email messages, otherwise, HappyForms will use your admin email address.
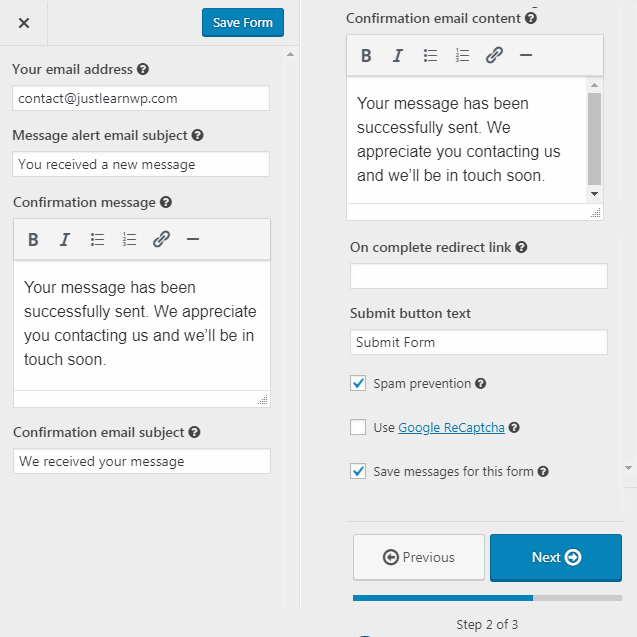
In the above screenshot, You can see all the necessary settings. Don’t forget to add message alert email subject, when a reader of your blog will send you a message, you will receive a message with your given subject.
Redirect option lets you set any specific page of your choice, You can redirect the user to your blog home page, to a specific page/post, downloads, store or any other page.
The default text for the submit button is “Submit Form”, You can change it “Send Message”
or something else.
Spam Protection: In the next step don’t forget to check the Spam Protection checkbox to protect your forms against spam bots by using HoneyPot security. You can even use Google Recaptcha for the more advanced spam protection.
Save messages: The last and 3rd checkbox lets you choose to save messages and recipient responses for all your forms. If you have multiple forms and you don’t want to save messages for any specific form, just uncheck this box.
Final Form Settings
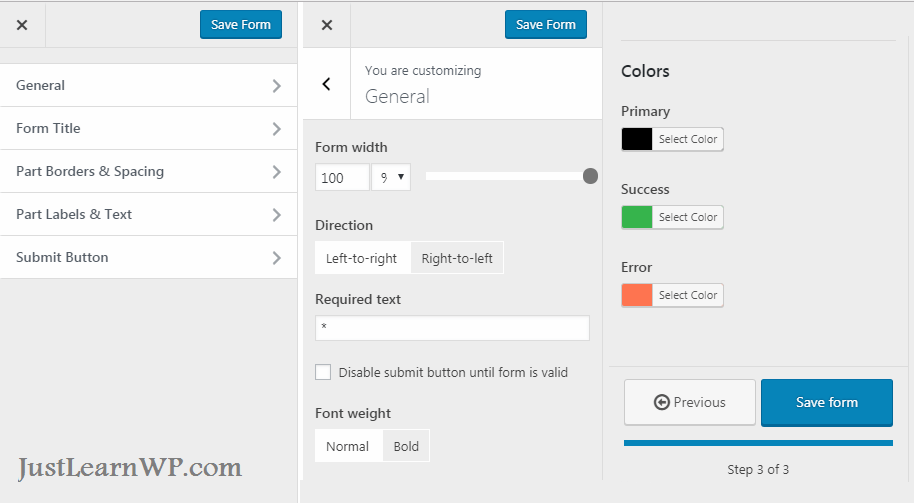
In this 3rd and final step of creating the form, you have some additional settings to completely customize the form. You can change the width, direction, colors, font-weight and other settings.
You can even Disable submit button until the form is valid. Most of the free form plugins do not offer this feature.
Under the Form Title settings, You can hide/show title, change the alignment (left, right, center) and font size.
Under the Submit Button settings, You can completely customize this button by changing the color width, height, size, and border-radius.
Adding Forms to your Post or Page
After creating the forms, You can add it any post, page or widget area. You can go to Happy Forms > All Forms screen to view all your forms, From this screen, simply copy the shortcode for your form and paste it anywhere you want to show your form.
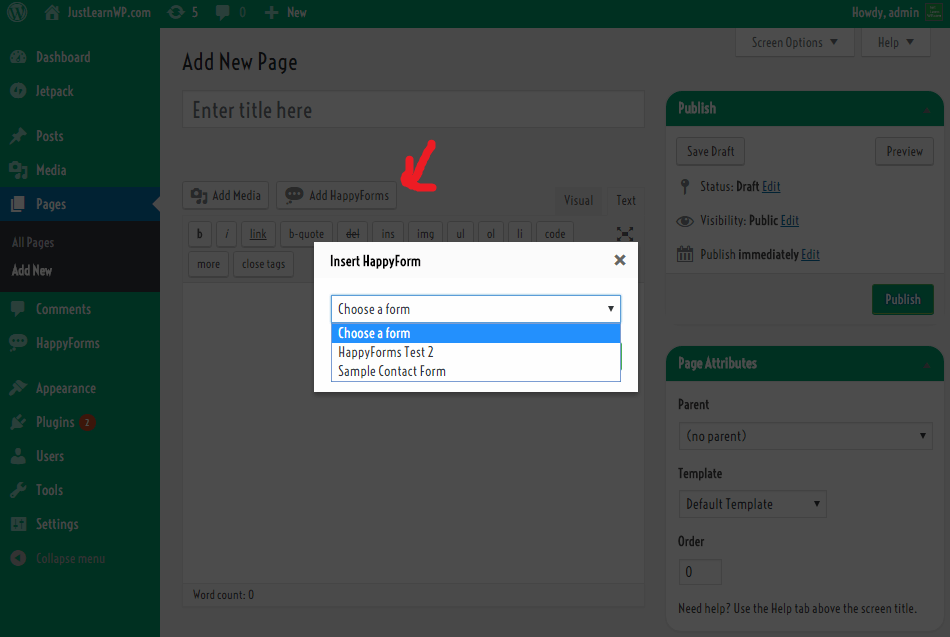
If you are creating a post or page, You can click on Add Happy Forms button, a dialog box will appear, select your form and click insert button, a sort code will be added to your post or page.
HappyForms is also available as a widget under Widget sections, so you can just drag and drop it on any widget area, select your form and save changes. That’s all.
Final Words
I have used many contact form plugins, and this one is the best contact form plugin. It gives you enough options to create and customize forms very easily. Default options are enough and you don’t need to install additional add-ons.
If you are looking for a great free contact form plugin, just give it a try, I bet, You will love this great free contact form plugin.