Fast Secure Contact Form is a free WordPress form plugin. With this free plugin, You can add multiple forms to your WordPress site. You can build customizable forms because it lets you add, reorder or remove all fields.
This is a free plugin from vCita, A free all-in-one business app to Manage all your clients, take notes, mark for follow-up and respond to client requests while on-the-go.
vCits’s Calendar management features let you manage your business schedule, appointments, and events, all in-sync with your existing calendar.
Billing & invoicing feature lets you create and email branded invoices and track your business income with a centralized dashboard. View All vCita Features
The contact form will let the user send emails to a site’s admin. In this article, You are going to learn how to create, customize and add contact forms to your site using this free form plugin.
How to install Fast Secure Contact Form Plugin
There are two ways to install the plugin, You can install directly from WordPress dashboard or you can upload a file manually. Login to your WordPress dashboard and go to Plugins > Add New and search for Fast Secure Contact Form. Install and activate the first plugin from the list.
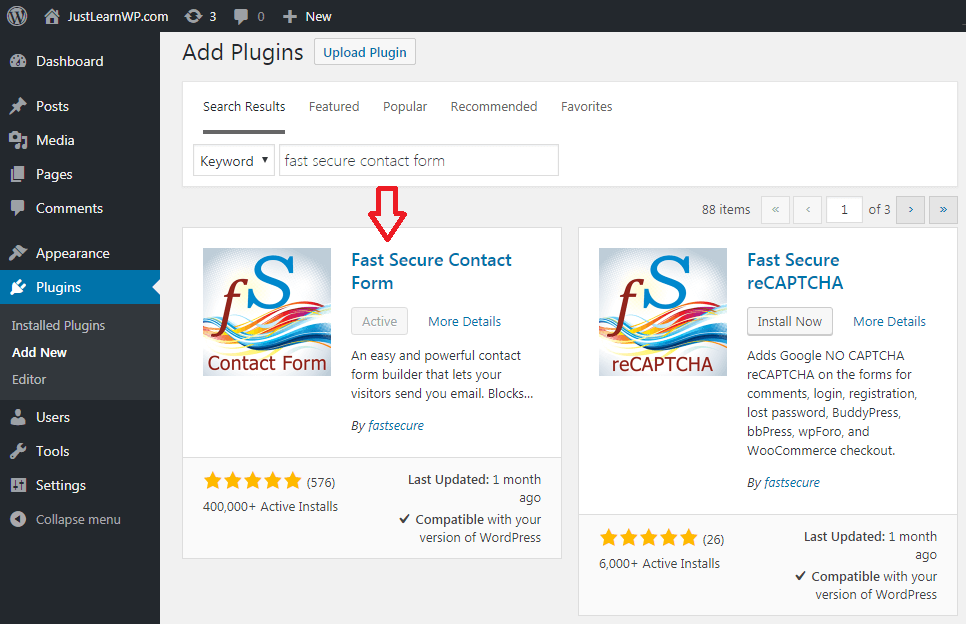
Once the plugin is installed and activated, You can go to Settings > FS Contact Form or visit Plugins > Installed Page to view all installed plugins. Click on Settings link to view all settings of Fast Secure Contact Form plugin.
Adding a new contact form
In the screenshot below, You can see the basic settings from Fast Secure Contact Form plugin.
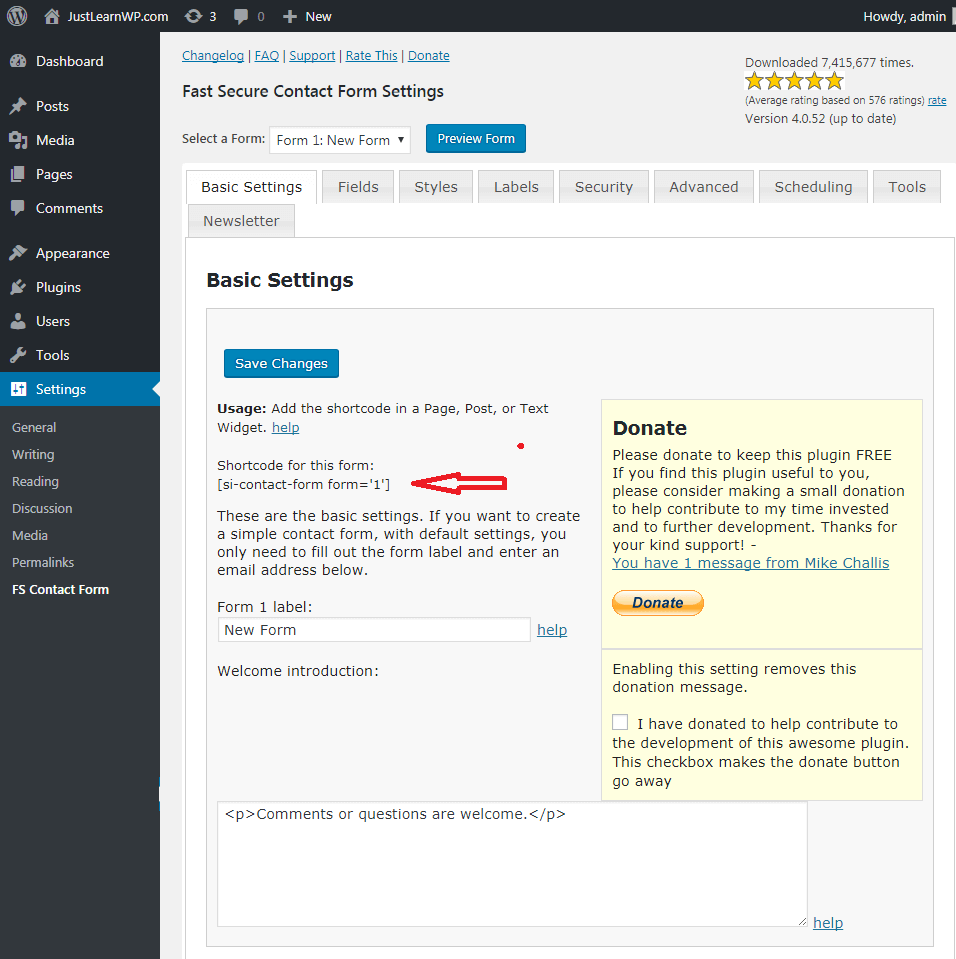
Under Select a From the drop-down menu, You will see three options.
- Form 1 – New Form
- Form 2 – New Form
- Add a New Form
You can click on the blue preview button to see the live preview of your form. Under the basic settings, You can find a shortcode [si-contact-form form='1'], which you can paste into any post, page or a widget area, where you want your form to appear.
It is a common practice to create a new dedicated page for contact. Go to Pages > Add New to create a new page. Add a title for your page such as Contact Us and select text tab. Don’t use Visual editor to paste shortcode.
Now add the following [si-contact-form form='1'] shortcode in the text area. Save your changes. Click preview button to see how your contact form appears on the front end. If you are satisfied with the settings, click publish button.
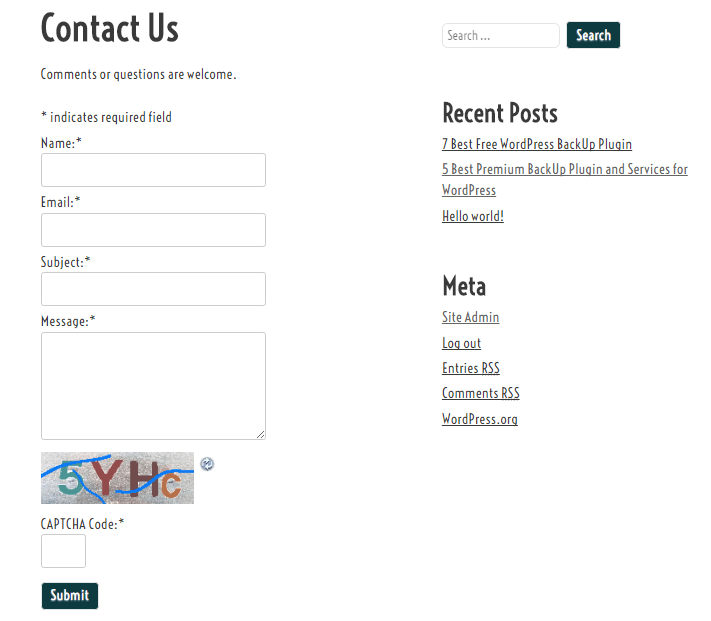
In the above screenshot, You can see the preview of the form generated with Fast Secure Contact Form plugin. The basic form is very simple and has all the necessary fields, you need for a basic contact form.
- Name
- Subject
- Message
- Captcha
Once your form is live, it’s time to make sure your contact form is working properly, so your visitors can send you messages without facing any problem.
Fields types to create Advanced Forms
Some free WordPress contact plugins do not allow you to create advanced forms, only basic fields are available for free version but Fast Secure Contact plugin has all the fields you need to create useful forms.
Click on the Fields tab to add or remove any field to your form. The current version has 16 fields-types.
- Text
- Textarea
- Checkbox and Checkbox-multiple
- Radio
- Select and select-multiple
- Attachment
- Data and Time
- URL
- Password
- Hidden
- Fieldset (box-open) and Fieldset (box-close)
Once your form is complete and you have published your contact form page, Visit your contact form page and send a test message to your yourself. The latest version 4.0.52 of Fast Secure Contact Form worked properly on our demo site. I was able to receive the test message.
Email Settings and Troubleshooting
Troubleshooting: Send a Test Email
Under Fast Secure Contact Form Settings page click on the Tools tab to view backup and test email settings.
The first section has a Send a Test Email option. If you are not receiving the email from your form, try this test because it can display troubleshooting information.
Under Tools and Backup section, You will find the following settings.
- Send a Test Email
- Copy Settings
- Backup Settings
- Restore Settings
- Reset and Delete
Email Settings
Under Basic Settings Tab, You can see all the email settings, By default, Fast Secure Contact Form send all emails messages to the admin email address but if you want to change or add another email address, you can add here.
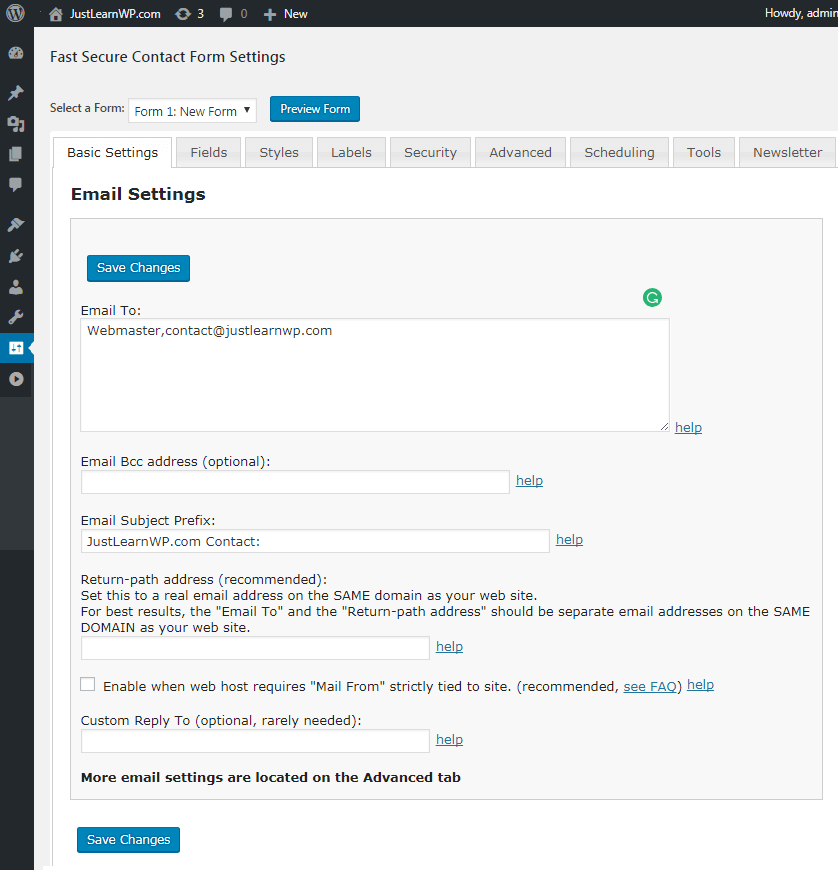
Email BCC option lets you receive Bcc (Blind Carbon Copy) messages. You can send to multiple or single, both methods are acceptable. Under email subject, You can add a custom subject.
Advanced email settings have the following options.
- Confirmation Email Settings
- Redirect Settings
- Advanced Form Settings
- Advanced Email Settings
- Silent Remote Sending Settings
Confirmation Email: If you want the form to automatically send a confirmation email message to the user who submitted the form, simply check the Enable confirmation email message check box.
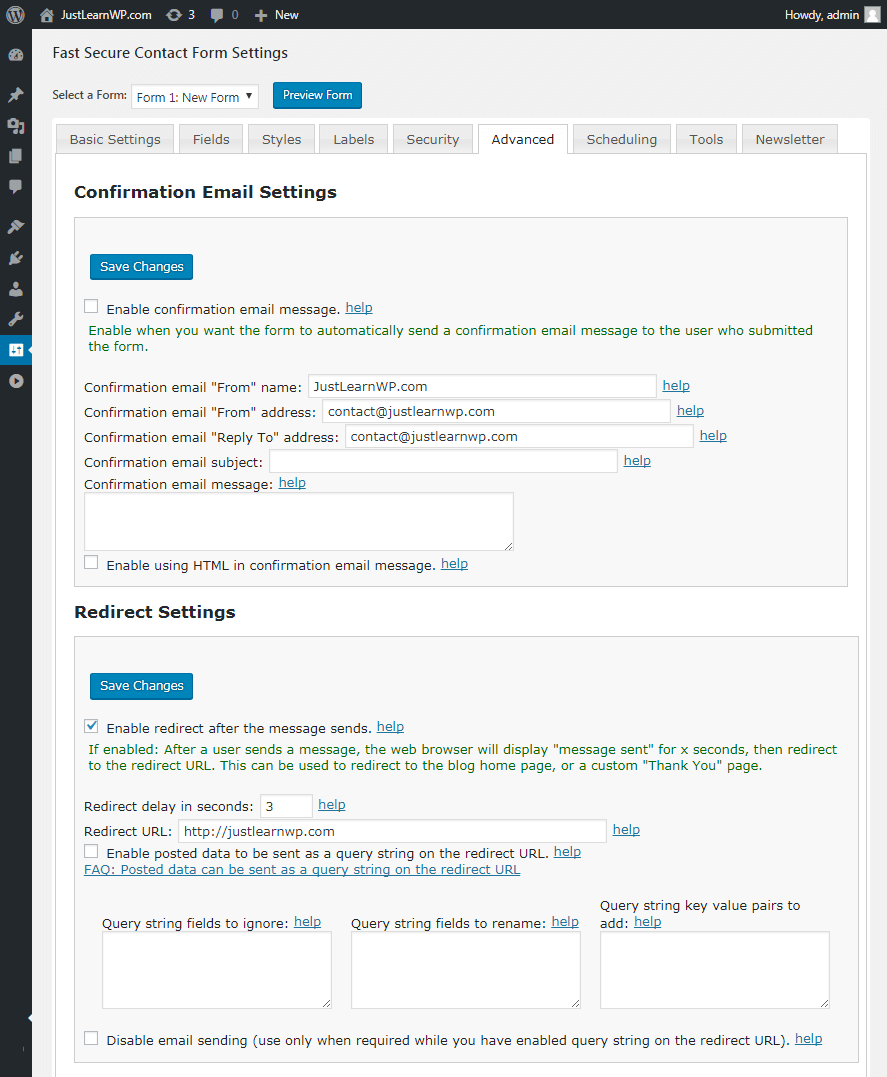
If Redirect Settings is enabled: After a user sends a message, the web browser will display “message sent” for x seconds, then redirect to the redirect URL. This can be used to redirect to the blog home page, or a custom “Thank You” page.
Conformation and Redirect settings are useful but you don’t need to change most of the other settings here.
CAPTCHA and Spam Prevention
Under security Tab, we have the following 3 settings.
- CAPTCHA Settings: Image Captcha limits spam by requiring that the user pass a Secure Image CAPTCHA test before posting. You can also enable Google reCAPTCHA V2.
- Akismet Settings: Akismet is a very popular spam prevention plugin. If you have installed and activated this plugin, the form will be checked with Akismet to help prevent spam.
- Domain Protect Settings: Helps prevent automated spam bots posting from off-site forms.
Custom styles for forms Under Style Settings, You can add/edit all the CSS styles for your forms. You have the option to use the internal or external stylesheet.
Appointment Booking & Online Scheduling By vCita
You can also let your client’s book appointments and request services online. it is very simple and easy to enhance your Contact Form with Online Scheduling. Just visit Scheduling tab and click on Scheduling Button Settings link. You will be redirected to vCita DashBoard.
Don’t forget to check the Add a scheduling button to your form check box. Once it is checked, “Schedule an appointment” button will be added next to your contact form.
More WordPress plugins by vCita
WordPress plugins by vCita will help you create websites that stand out from your competitors – building a stronger online presence, capturing more leads and delivering amazing service.

vCita WordPress plugins allow you to easily add advanced tools such as online scheduling, online payments, contact forms, file sharing and more.
Following plugins are available.
Appointment booking: Add a schedule button or display a calendar and offer services, fees, locations and staff members, and let your clients schedule a phone call, appointment or a service right from your website.
Free HTML contact form builder: An easy-to-use, drag and drop form builder that lets you create custom forms and add them to any page on your website.
CRM and contact management: vCita WordPress CRM plugin sends each client request to an online repository of contacts, helping you manage your client base and follow-up with clients captured through your WordPress website.
Online payment forms: Accept credit card payments on your WordPress website. Get paid faster by a “pay now” button or a payment form.
Lead capturing call-to-actions: capture more leads and alert visitors of new messages, upcoming appointments or outstanding invoices.
Download Free WordPress plugins by vCita
Final Words
We used the latest version of this WordPress form plugin and it is very simple and easy to use plugin with all the features you need to create useful forms for your personal blog or a client side.
All the necessary field-types are available in this free plugin. And you don’t need to know HTML or CSS to use this plugin. The default forms look great but advanced users can customize the forms styles.