All in One SEO Pack, as the name suggests, is an SEO suite for WordPress websites. The plugin is by far one of the most popular and powerful solutions to help you with all SEO related tasks on your website.
It packs in a plethora of functionalities to help you add meta tags, generate XML sitemaps, avoid duplicate content, and much more.
Now, for the purpose of this read, we have put together a comprehensive step by step tutorial on All In One SEO Pack.
if you have a blog or planning to start a blog to make money online, You need to optimize your content for Google and other search engines.
We will cover all the different options this SEO plugin has to offer and provide an in-depth guide on how to use these functionalities to optimize your SEO and get better rankings on search engines.
So without further ado, let’s get started!
All In One SEO Pack – Features
In the list of must-have WordPress plugins for your website, the All in One SEO Pack plugin is one plugin worth checking out. Before we dive into how to use the different bells and whistles integrated into the plugin, let’s get a clear idea on some of the features it offers.
- XML Sitemap Generator with in-built support for automatic submission to Google and Bing.
- Support for image XML sitemaps.
- Automatically notifies search engines like Google and Bing when you make updates to your website.
- Helps with SEO for Google AMP compatible pages on your website.
- Advanced Canonical URLs to help ensure uniqueness of your content.
- Titles are automatically optimized according to SEO best practices.
- Can help with automatic generation of Meta Tags.
- WooCommerce support.
- Nonce security built-in.
- A Pro Version is also available introducing plenty more advanced functionalities.
And much more.
All In One SEO Pack Plugin – Step By Step Guide
Now with all the features and functionalities clearly laid down on the table, let’s dive into our step by step guide on how to use the All In One SEO Pack plugin to optimize your website for organic traffic.
Step 1: Installing the Plugin
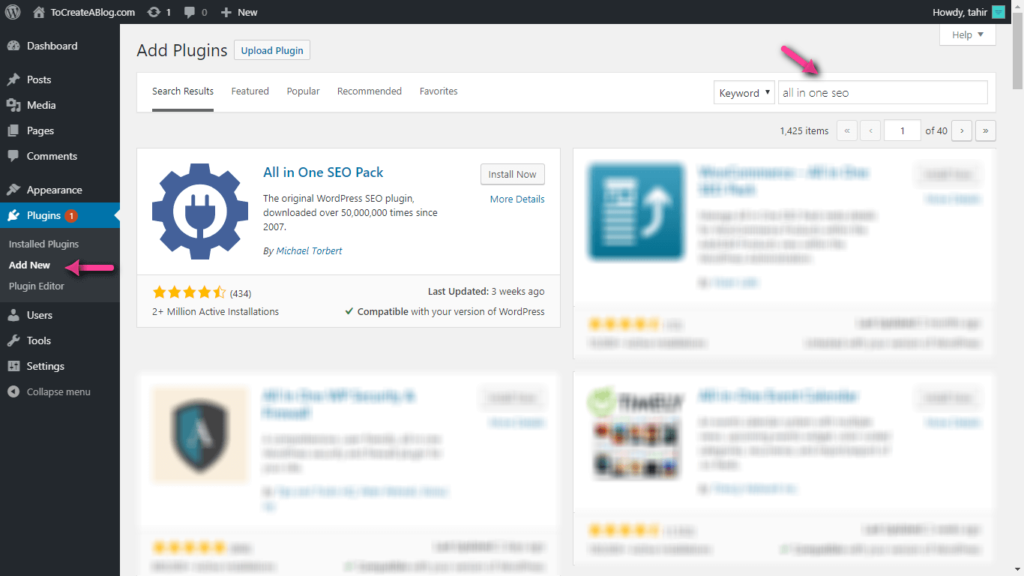
Go to your WordPress Dashboard > Plugins > Add New. Now type in “All In One SEO Pack” in the search field and hit enter. A list of the plugins should appear on the screen as shown in the image below.
Simply click on the Install button on the All In One SEO Pack plugin followed by Activate. Once done, a new section – “All in One SEO” will appear on the WordPress Dashboard left-hand sidebar.
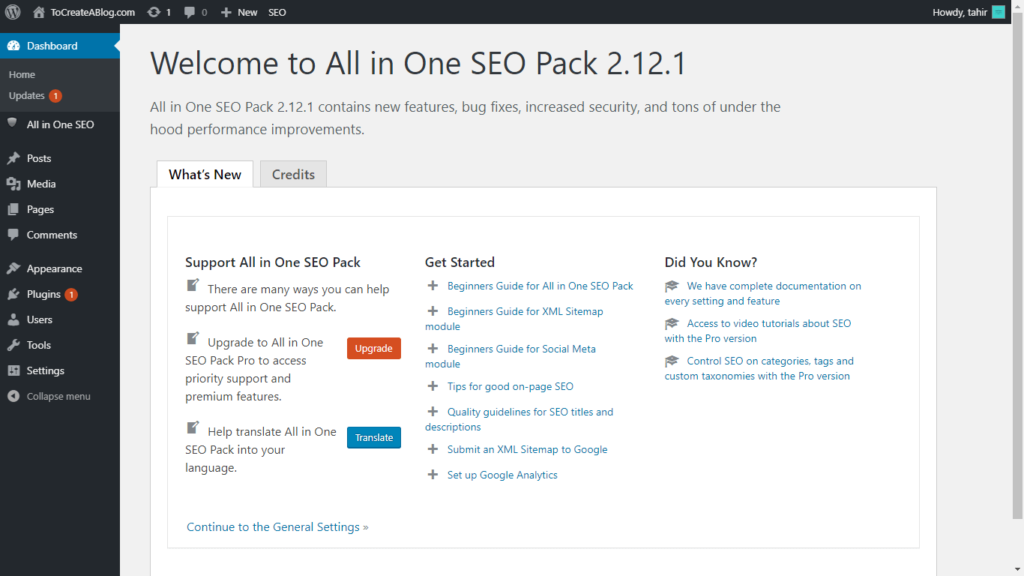
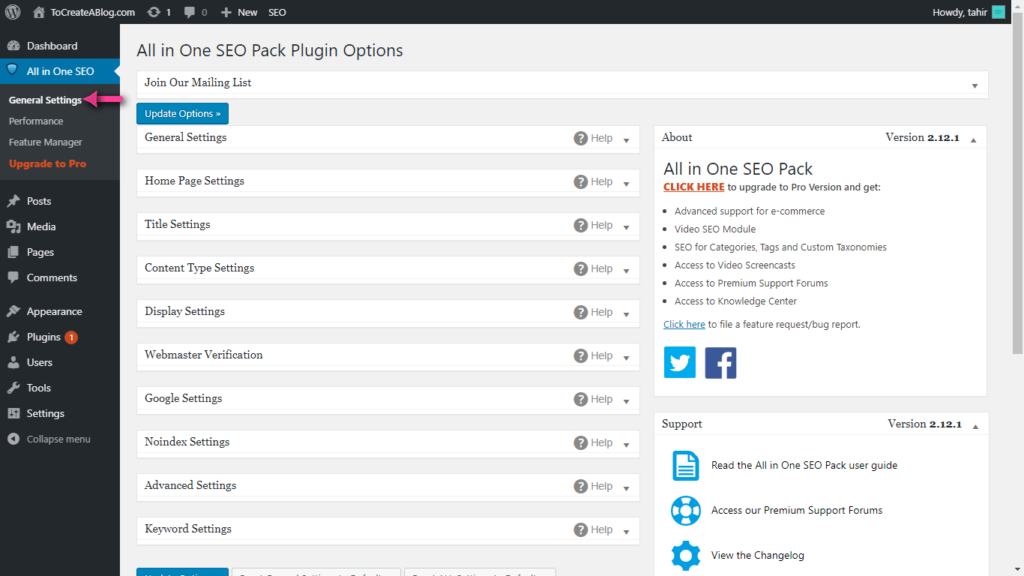
Now, heading into the All in One SEO section from your WordPress dashboard you will be greeted with three main options – General Settings, Performance, and Feature Manager. An Upgrade to Pro option is also available for free users to upgrade and available premium features.
Step 2: General Settings
Under the General Settings tab, you will find a plethora of different options to help you with different SEO aspects of your website. Let’s go over them one by one:
- General Settings: Here, you will find the options to enable or disable – Canonical URLs, Pagination for Canonical URLs, custom Canonical URLs. You can also specify whether or not you want to use Original Title in URL and even enable Schema.org markups.
- Home Page Settings: From here you will be able to set the meta title of your homepage and even include a homepage meta description. All of this can be used by search engine bots and web crawlers to understand the content of your website and help you rank accordingly.
- Title Settings: A plethora of options which lets you choose whether or not you want rewritable titles, and specify the format of your home page title, page title, post title, category title, archive title, date archive title, author archive title, tag title, search title, and even the formatting of your descriptions and 404 pages.
- Content Type Settings: This option allows you to select the different content types on which you want to use the plugin features for optimization purposes. By default, it is only available for pages and posts. But you can add media elements, blocks, dashboard notes, user requests, etc.
- Display Settings: Here, you can specify which screens get to display the SEO titles, SEO keywords, and SEO description columns.
- Webmaster Verifications: Simply copy paste the verification code you get from Google Search Console, Bing Webmaster Tools, and Pinterest Site Verification to enable seamless integration with your site.
- Noindex Settings: Options to help you assign noindex and nofollow tags to different content types on your site to limit access of search engine bots and web crawlers.
- Advanced Settings: From here you can specify whether or not you want auto-generated descriptions, remove descriptions from paginated pages, shorten long descriptions, protect post meta fields, redirect attachments to post parent, and much more.
- Keyword Settings: Finally, there is the keyword settings section which lets you specify whether or not you want to enable or disable meta keywords throughout the whole of your website.
Step 3: Performance
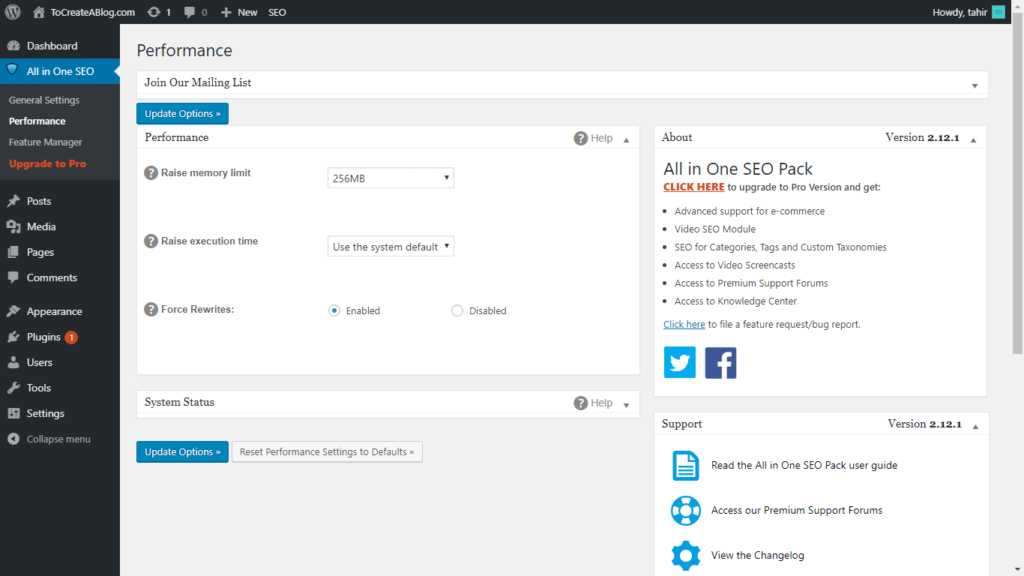
Under the performance section, you will find settings and options that let you specify the PHP memory limit, raise PHP execution time, and enable/disable output buffering to ensure titles are rewritten. The latter option is useful in case you run into issues where the title tags are getting changed by another plugin or theme on your website.
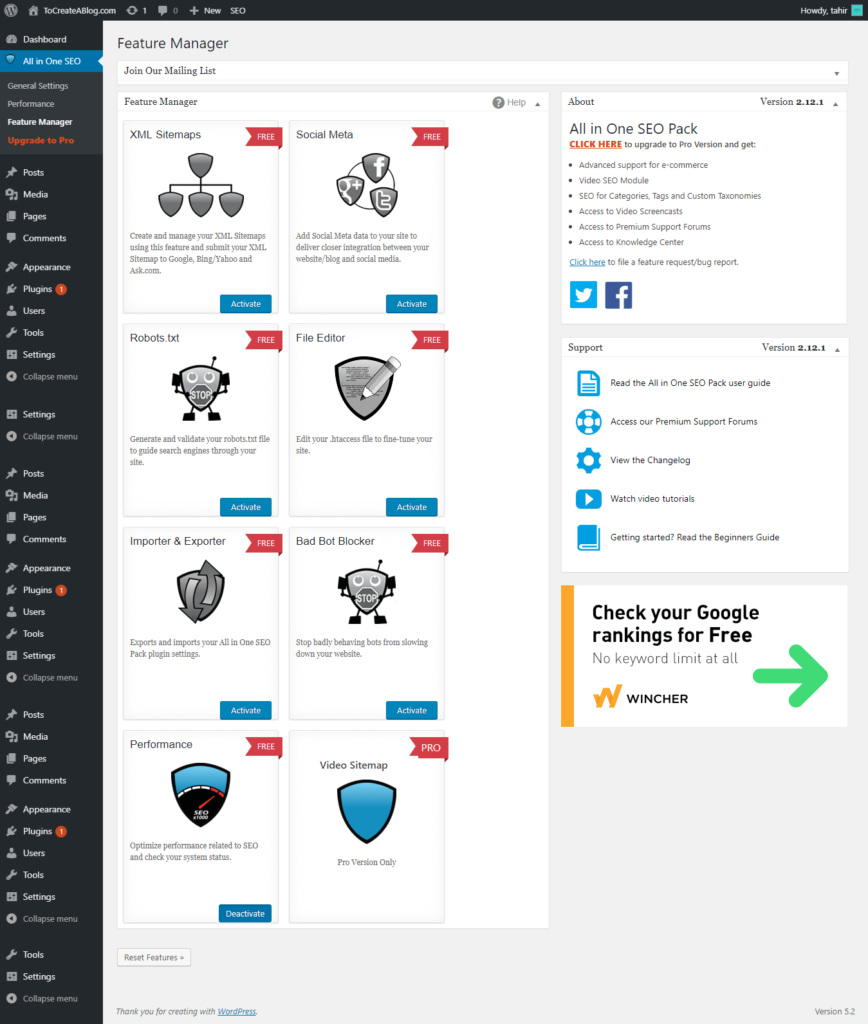
Step 4: Feature Manager
From here you get to enable or disable many key features of the plugin that functions automatically to help optimize your website to generate higher search engine traffic. These options include:
- Create and Manage XML Sitemaps.
- Add Social MetaData.
- Generate and Validate robots.txt file.
- File Editor to access and edit your .htaccess file.
- Bad Bot Blocker that stops and disables bots that impacts your site’s performance.
Premium Version
By and large, all the features provided with the free All in One SEO Pack is more than enough for the average blog and website that’s just starting out.
However, if you want to get a competitive edge over your competition in terms of SEO, then the premium version holds plenty of advanced functionalities that can help.
Some of these features include:
- Create and Manage Video Sitemaps.
- Advanced Support for eCommerce.
- Video SEO Modules.
- SEO for categories, tags, and custom taxonomies.
- Access to video screencasts.
- Premium support forums and knowledge center and much more.
Conclusion
This about sums up the step-by-step guide. Having a fully-functional SEO plugin on your website helps you to avoid common SEO mistakes.
As you can see, installing the All in One SEO Pack is pretty easy and the SEO benefits of it are truly amazing. Thus, do check out this free plugin and follow this guide if you are planning on installing it on your website.
